How to Register E-Mandate for Mutual Fund?
Mandate refers to an authorization or a command given by one person to another to carry out a certain act. With the advancements in technology, individuals can now opt for the E-Mandate to make payments with an objective to digitize the mandate registration process. So, let us see the process of how to register the E-Mandate process for Mutual Fund payments.
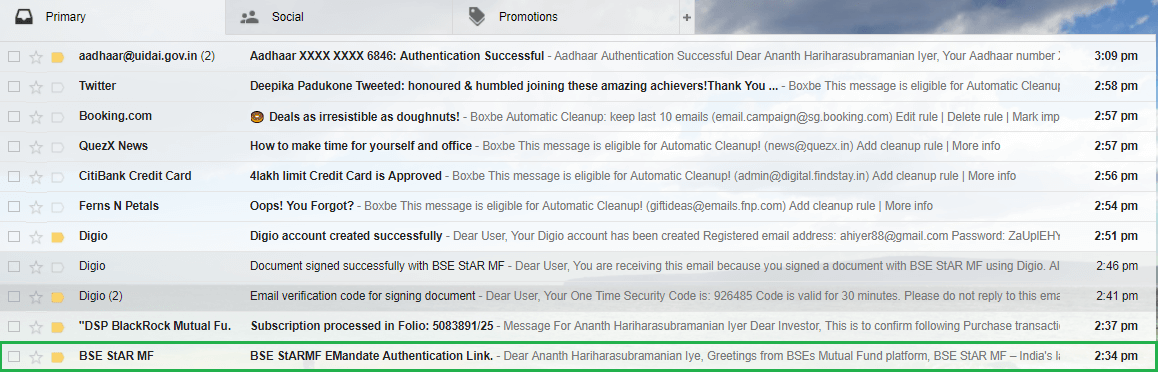
1. Log into Your Email Inbox and Open the Mail from BSE StAR MF
The first step begins by logging into your email and check in the inbox whether you have received any email from BSE StAR MF. Once you find the email, you need to open the it. The image for this step is given below where the email of BSE StAR MF is highlighted in Green.
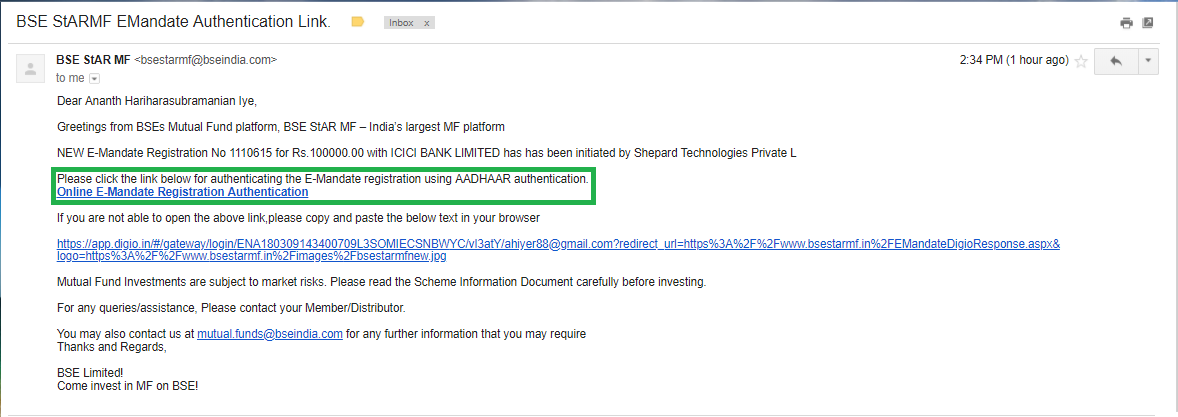
2. Click on Online E-Mandate Registration Authentication
Once you open the email from BSE StAR MF, you can find a URL stating Online E-Mandate Registration Authentication which is in blue. You need to click on the URL to begin your E-Mandate registration using Aadhaar authentication. The image for this step is given below where Online E-Mandate Registration Authentication is highlighted in Green.
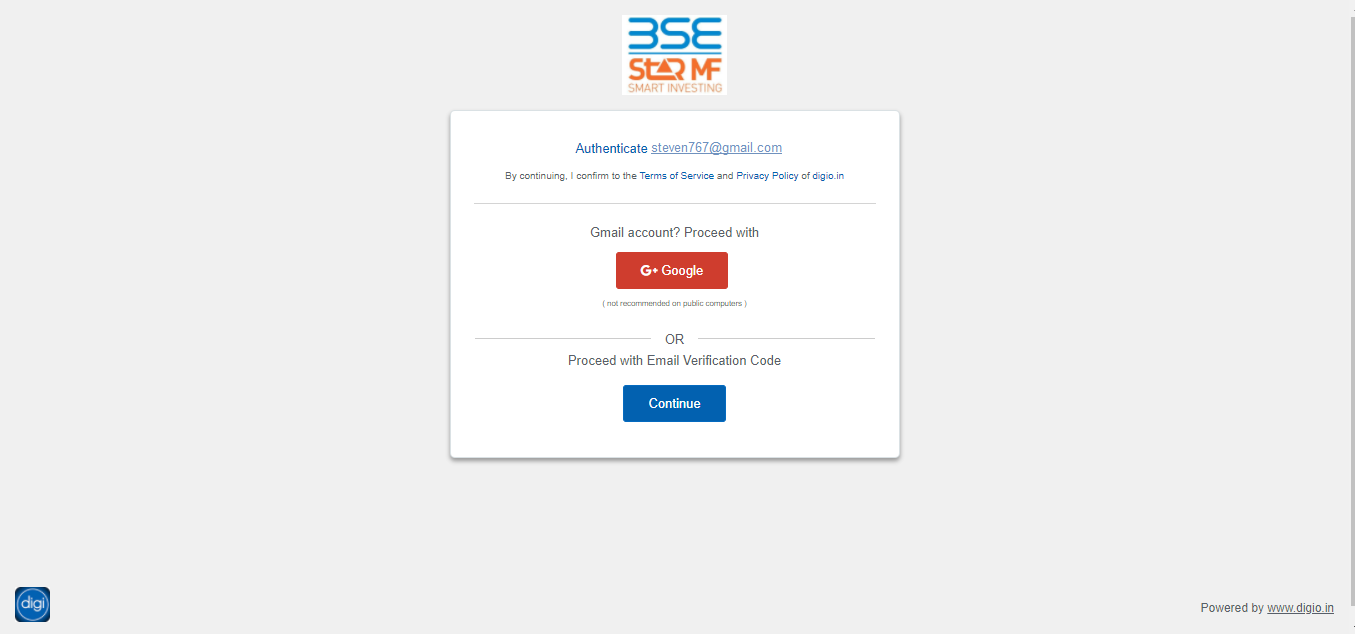
3. Log in with Your Email
Once you click on Online E-Mandate Registration Authentication, a new screen opens up. Here, you can log in with your Google email address or else, for others, you need to click on Proceed with Email Verification Code. Here, we choose to proceed with Email Verification Code and hence, we click on Continue. The image for this step is given below.
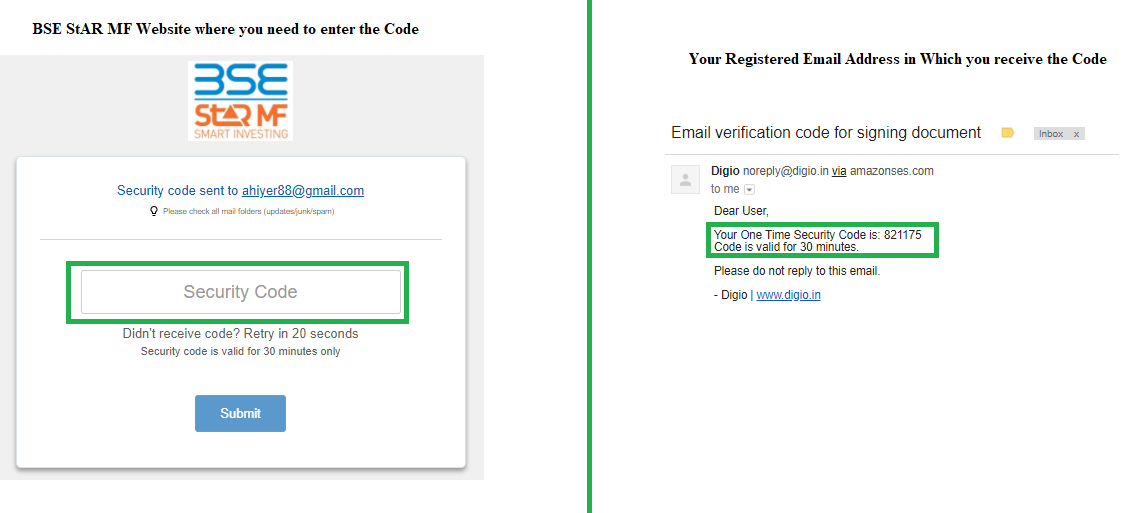
4. Enter Security Code
In this step, you need to enter the security code that you have entered in your email. After you enter the code, you need to click on Submit. Even the box where the code needs to be entered is also highlighted in Green. The image for this step is as follows which shows the snapshot of your email in which you receive the verification code along with the screen where the code is to be entered. The code is highlighted in Green in the email.
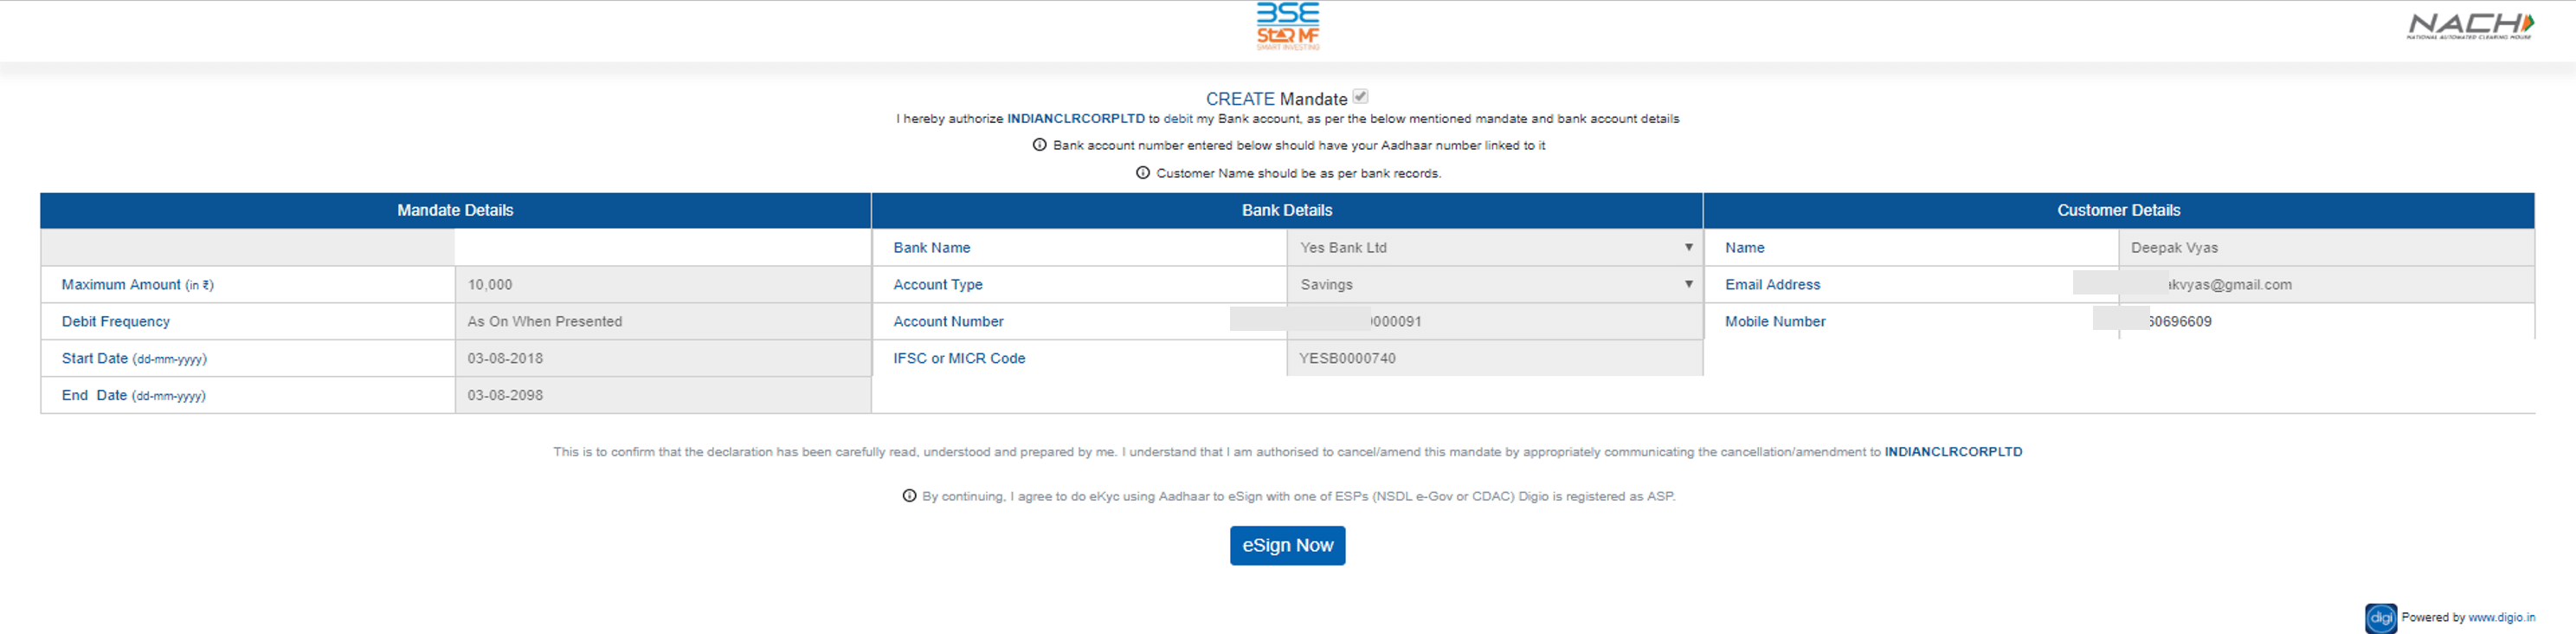
5. Enter Mobile Number
Once you click on Submit, a new screen titled as Create Mandate opens up. In this screen, you can see numerous details related to the mandate, such as Mandate Amount, Start Date, Debit Frequency, Bank Name from which the amount will be debited, Account Number, IFSC Code, and much more. On this screen, you need to enter your Mobile Number which is on the right side of the screen. One of the important points that individuals need to note is, the bank account that needs to be debited and the other number should be linked. If not, then, the bank will not be able to generate the mandate. Once you enter all the details, you need to click on eSign Now. The image for this step is given below where the Mobile Number and Aadhaar Number and eSign Now are highlighted in Green.
6. Aadhaar Verification
Once you click on eSign Now in the previous step, you will get a pop-up on the screen wherein; you are required to generate VID (Virtual ID). On this screen first, that is for mobile users, you need to copy paste the given link to generate VID. For desktop users, you need to click on the given option (on the left side of the screen) to generate VID, and then proceed to e-sign. For users who have VID they can click on 'Already have VID' option.

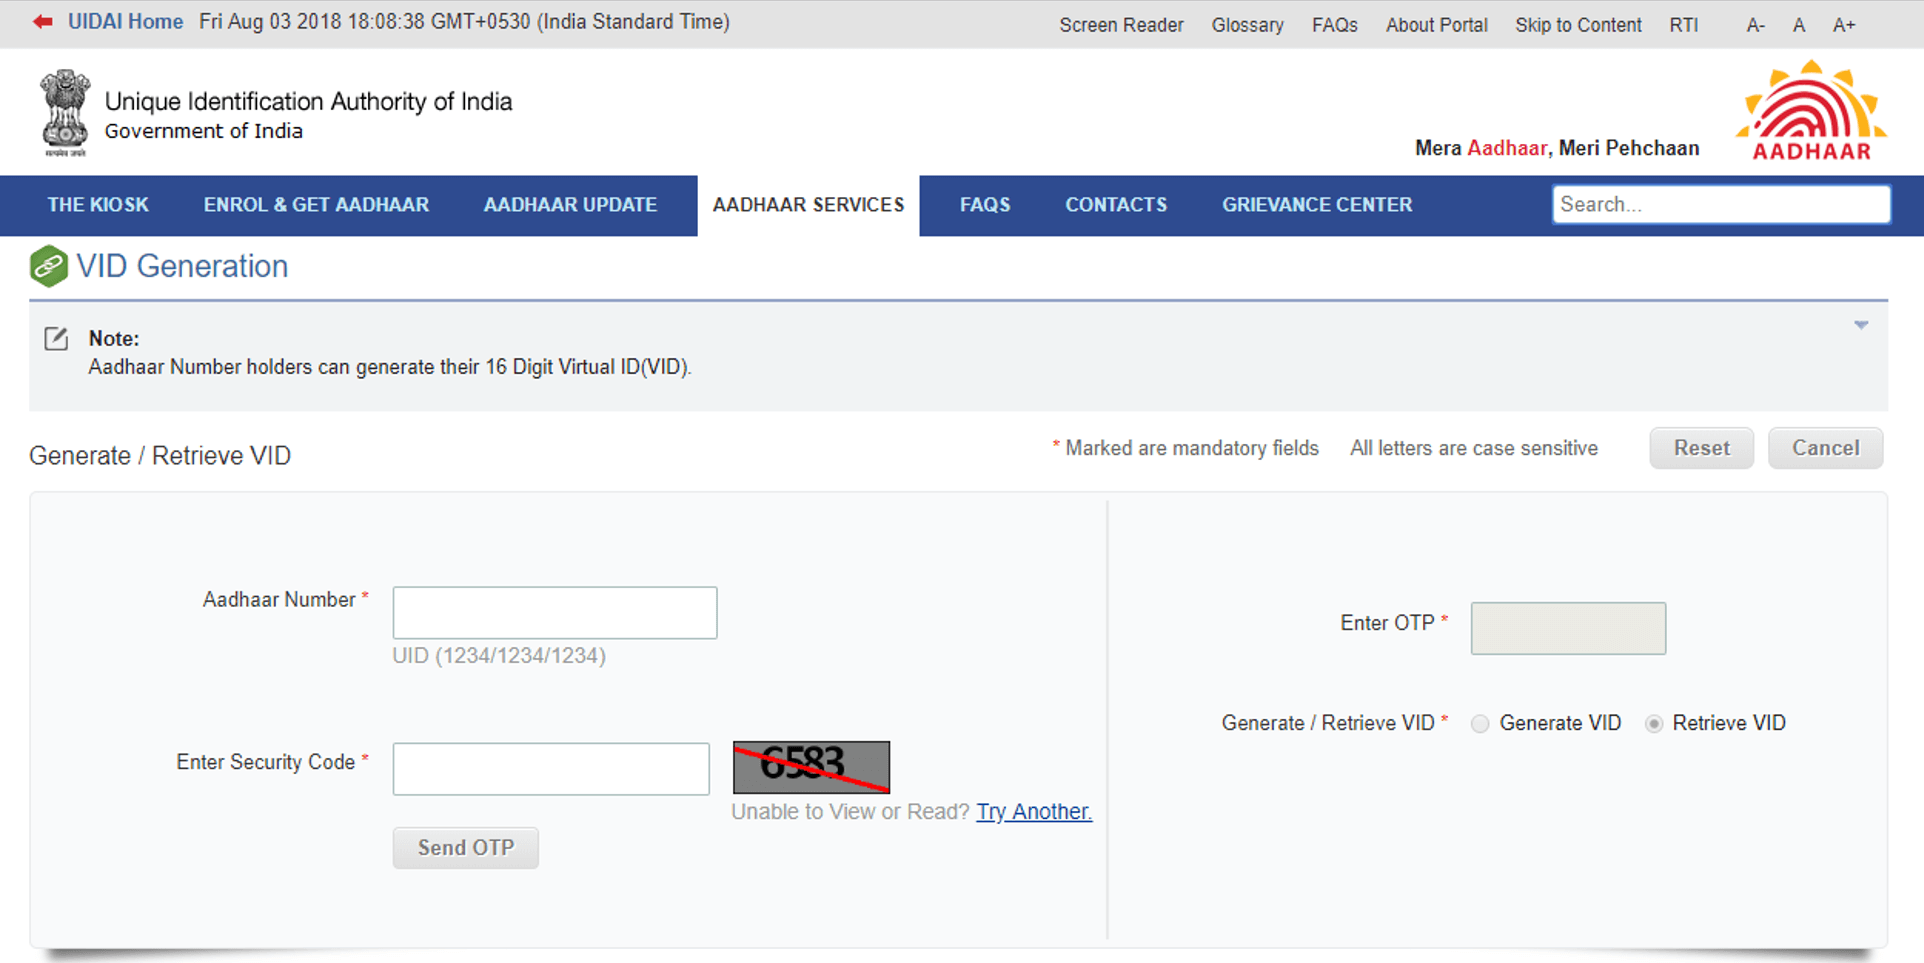
7. Enter OTP
On this page, you need to enter your Aadhaar number and the security code which is mentioned on the screen. Once you enter these details, click on Send OTP and then the enter the OTP in the given box. Following this process, to generate a new VID, click on Generate VID and to retrieve, click on Retrieve VID.
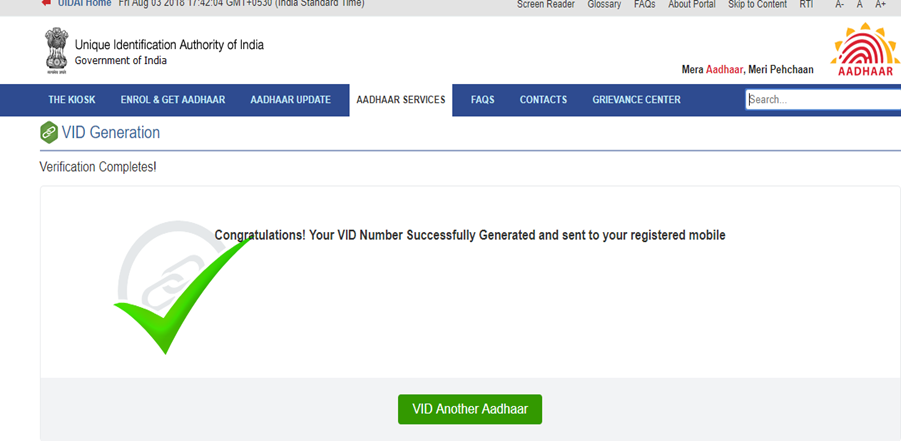
8. Confirmation of VID Generation
The confirmation of 16-digit VID number will open in the new page, and the same will also be received in your registered mobile number. The image for this page is given below.
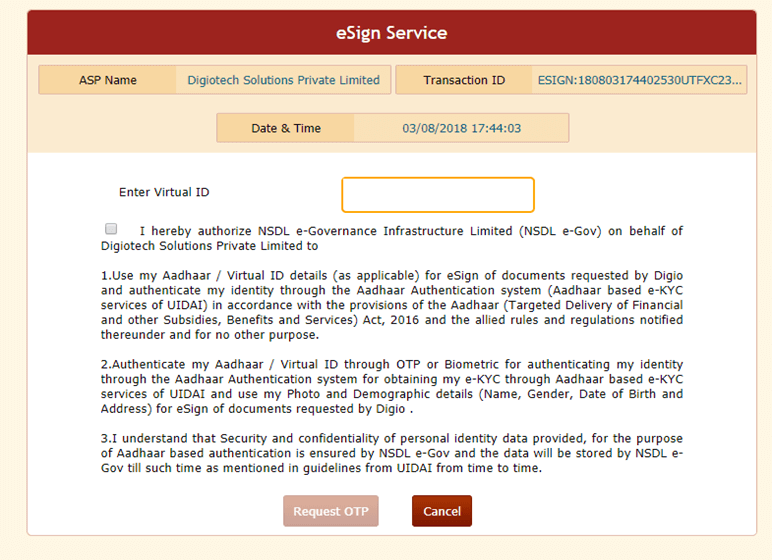
9. Enter Virtual ID
In this step, you need to enter the 16-digit virtual id and click on the small box which is for authorization process. Followed by, you need to click on the 'Request OTP' option below.
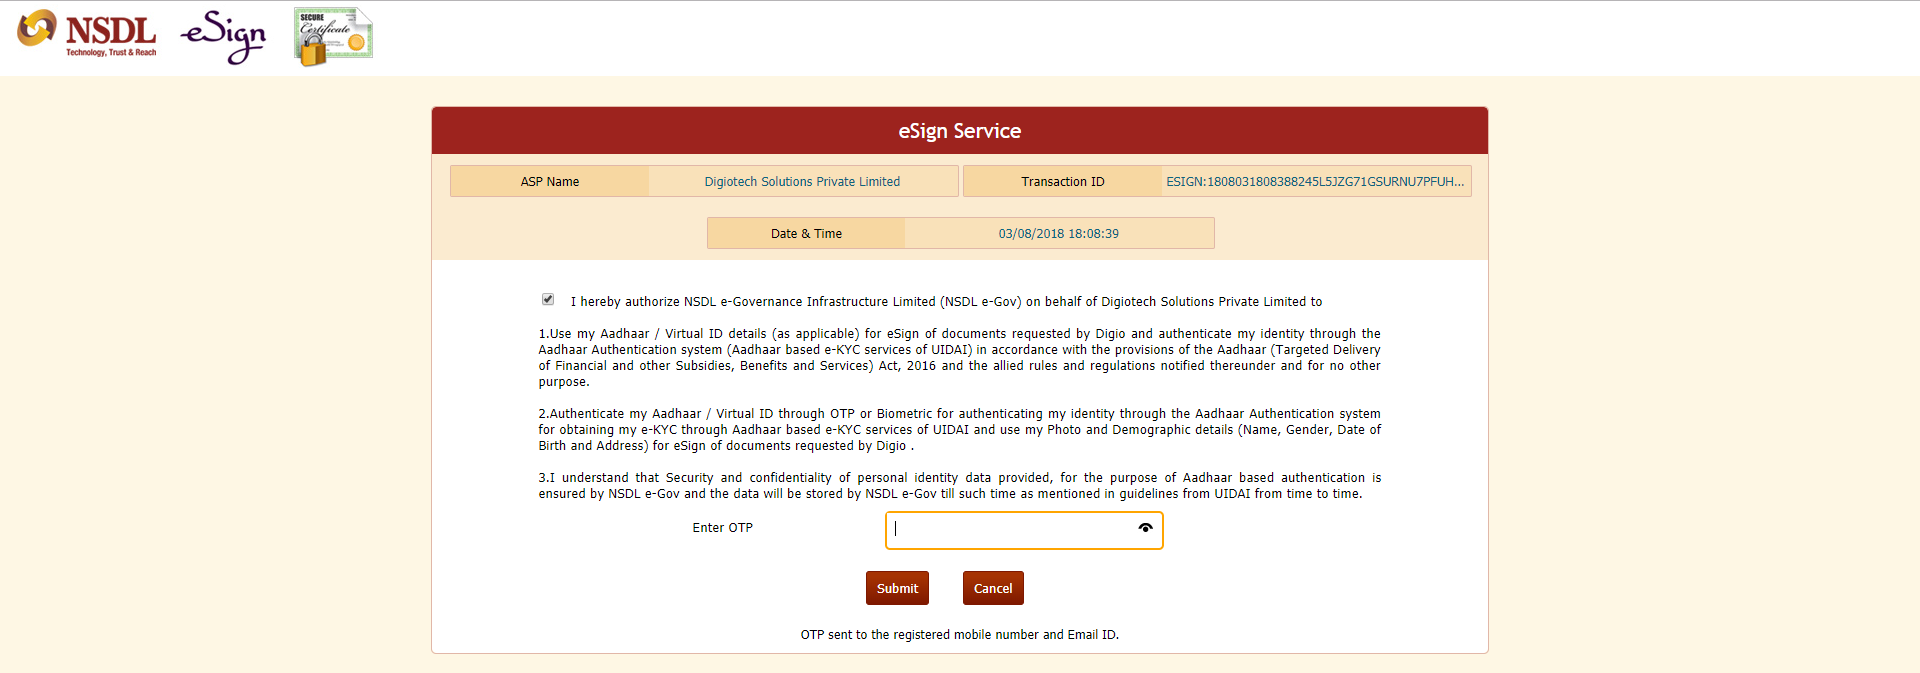
10. Enter OTP for Completing E-sign Process
This page will take you to an option where you need to enter the OTP and submit to complete the e-sign process.
Thus, from the above steps, it can be said that the process of registering an E-Mandate through BSE StAR MF is easier. However, individuals need to follow certain pre-requisites before registering the E-Mandate process. They are:
- The maximum limit for a Mandate is not more than INR 1 Lakh.
- Since E-Mandate is based on Aadhaar therefore, registration of mobile number with Aadhaar is a must e-signing of the mandate.
- Moreover, Aadhaar number must also be updated with the bank account that is used for registering.
- The banks must be for registering an E-Mandate by NPCI.
In case of any further queries, you can contact us on +91-22-62820123 on any working day between 9.30am to 6.30 pm or write a mail to us anytime at support[AT]fincash.com or chat with us by logging onto our website www.fincash.com.
All efforts have been made to ensure the information provided here is accurate. However, no guarantees are made regarding correctness of data. Please verify with scheme information document before making any investment.


")
 Mutual Fund in India")


AMFI Registration No. 112358 | CIN: U74999MH2016PTC282153
Shepard Technologies Pvt. Ltd. (with ARN code 112358) makes no warranties or representations, express or implied, on products offered through the platform. It accepts no liability for any damages or losses, however caused, in connection with the use of, or on the reliance of its product or related services. Terms and conditions of the website are applicable.
©2026 Shepard Technologies Private Limited. All Rights Reserved