How to Do SIP Through Net Banking on Fincash.com Using ICICI Bank?
SIP or Systematic Investment plan is an investment mode in Mutual Funds through which people can invest money as per their convenience at regular intervals. SIP helps people to attain their goals through small investments. Fincash.com offers SIP mode of investment in a number of schemes.
In the article on How to Choose Funds Through Fincash.com?, we saw how to select the product. So, in this article, let us look at the steps on how to do a SIP in Fincash.com through net banking. For this, let’s revisit the last step of placing an order that speaks about Investment Summary.
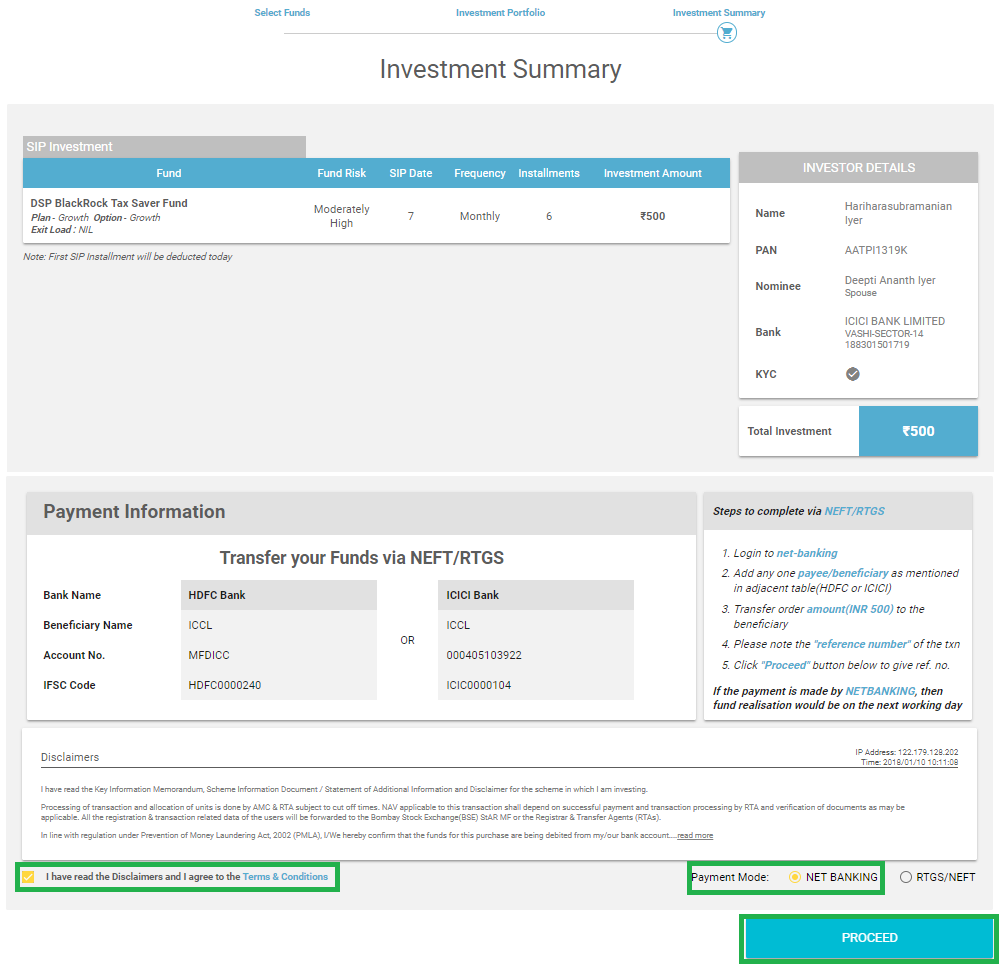
Investment Summary & Click Proceed
As mentioned above, it is the last step in the investment summary step. Here, people can review their investment details. Here, once people scroll down the screen, they will find a Disclaimer of the left side wherein; you need to put a Tick Mark. On the right side, you will find Payment Mode with two options Net Banking and NEFT/RTGS. Here, you need to select Net Banking Option. After you select both disclaimer and payment mode, you then need to click on Proceed. The image for this screen is given below as follows where disclaimer, net banking option, and proceed button are highlighted in Green.
Make Payment & Get Order Confirmation
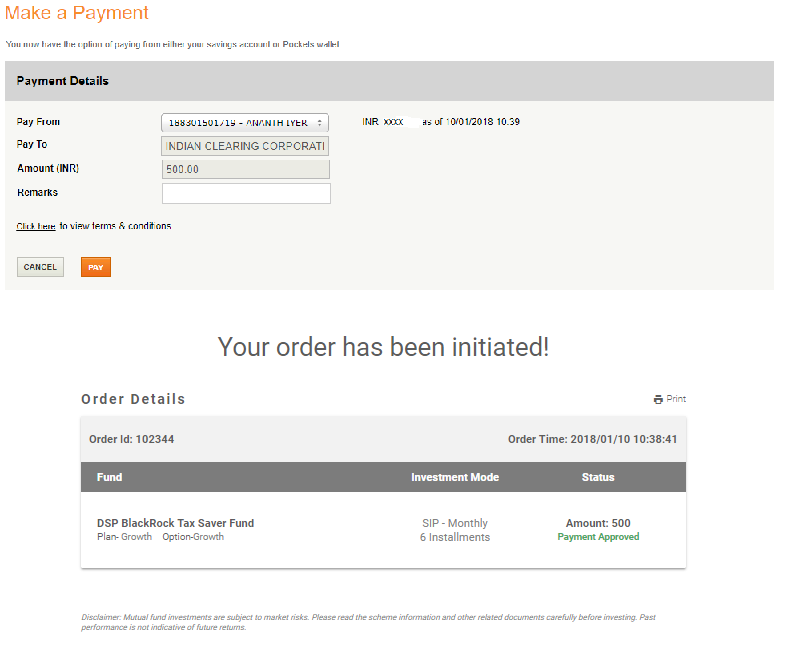
Once you click on proceed, a new screen opens which redirects to your Bank login page. This bank account will be your Default account which you have chosen while placing the order. Once you log in, a new page opens with respect to Payment Confirmation. Here, you need to click on Confirm/Pay to make payment. Once your payment is successful, you get a Confirmation regarding your order. The snapshot regarding payment and order confirmation is given below.
Do, you think, that the transaction over? No, there is still some more to go. Since you have opted for SIP through net banking mode of payment, you need to add the biller in your bank account so that every month the payment gets deducted automatically and you need not worry future SIP deductions. Just ensure that you have adequate balance to make the payment. So, let us look at the steps of how to add the biller to your bank account so that SIP takes place hassle-free.
The process of biller addition in each bank is different. So, let us take an example of how to add biller in ICICI Bank. The steps for the biller addition are:
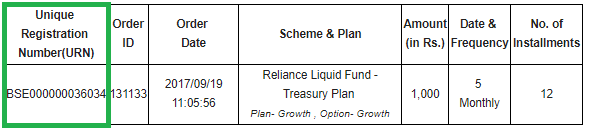
Step1: Copy the Unique Registration Number
Once you make your first payment, you will get a Unique Registration Number or URN on your email. You need to add this number to your bank account so that your SIP gets deducted automatically on time. The snapshot regarding the URN is given below where the URN is highlighted in Green.
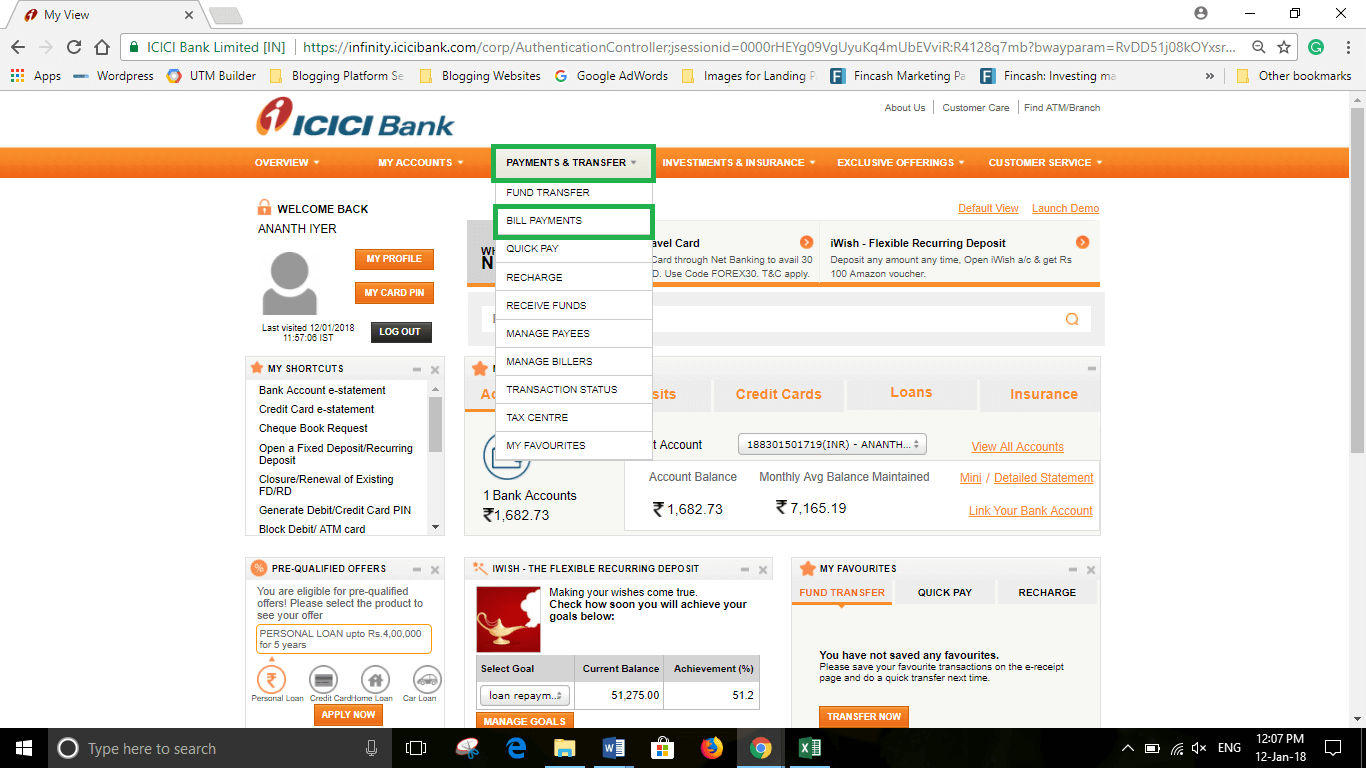
Step2: Log into Your Account & Select Payments and Transfer Option
After you copy the URN, then you need to log onto your net banking account. Once you reach the homepage of your account, look for Payments & Transfer Tab. Once you click on this tab, you will find many options such as fund transfer, manage billers, manage payees, and so on. Out of these, you need to select Bill Payments Option. The image for this step is given below where both Payments and Transfer Tab and Bill Payments are selected in Green.
Step3: Register for Pay New Bills
Once you click on Bill Payments, a new screen pops out. Here, you will see an option written as Pay New Bills. Here, you need to click on Register Option. The image for this step is given below where Pay New Bills and Register both are highlighted in green.

Step4: Select Mutual Fund Option
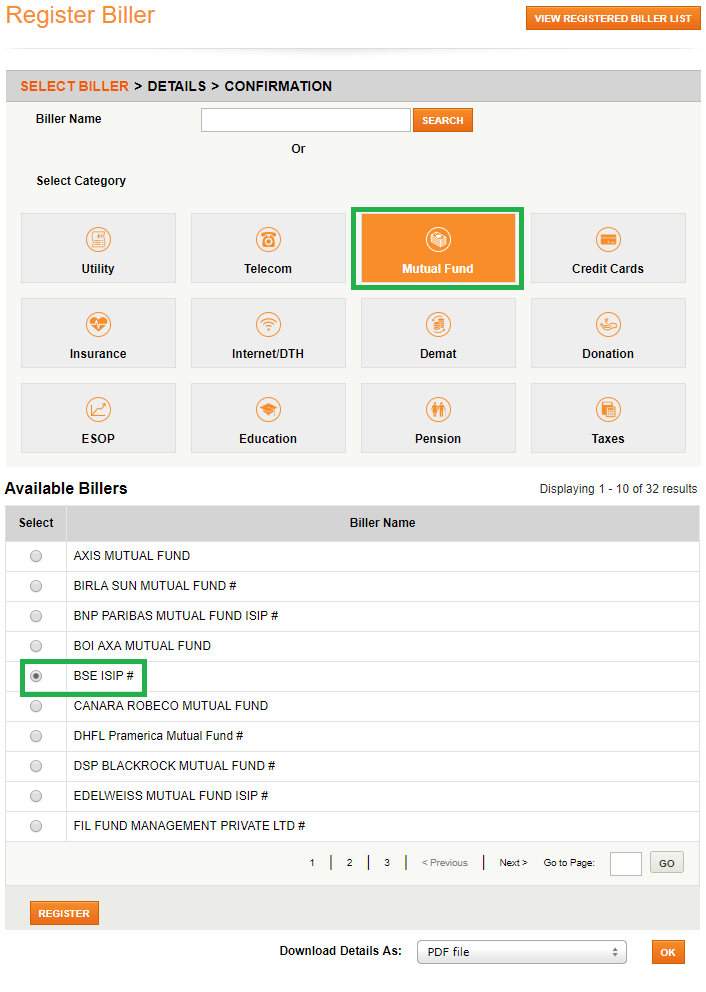
Once you click on Register, a new screen opens where a lot of biller categories are mentioned. Here, you need to select the option of Mutual Funds. Once you click on the Mutual Funds option, a list of billers opens up for which you need to select BSE ISIP# option. The image for this step is given below where Mutual Funds and BSE ISIP# buttons both are highlighted in Green.
Step5: Add Biller
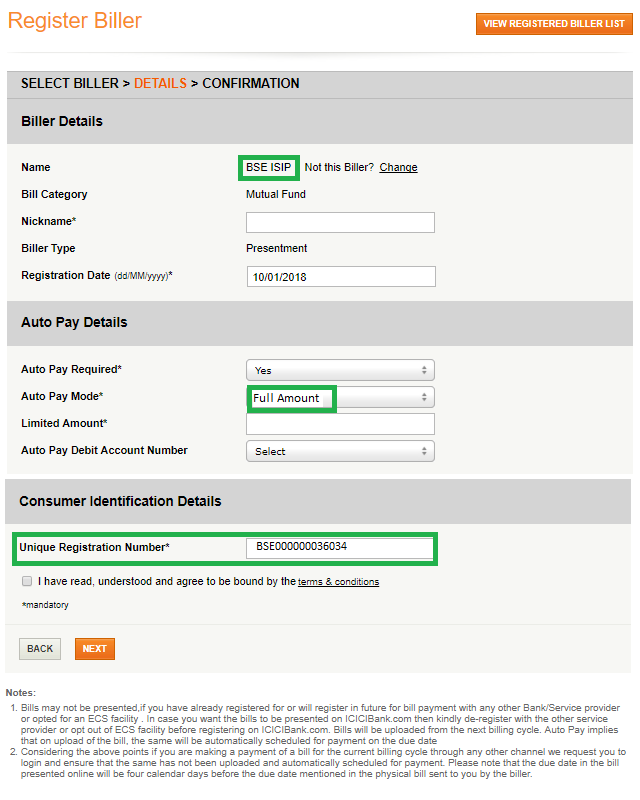
Once you click on BSE ISIP# in the previous step, a new screen opens where you need to fill the details of the Mutual Fund and enter the URN that you would have copied and click on Next. Here, you need to add other details such as Registration Date, whether the full or partial amount should be paid, whether auto pay is required, account number to be debited, and so on. The image of this step is given below as follows where the URN and Next Tab both are highlighted in Green.
Step6: Biller Confirmation
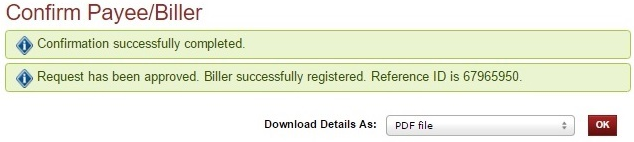
Once you click on Next Option, a screen will open where you are supposed to enter the URN number to confirm the biller registration post which the biller gets confirmed and you get a confirmation for the same. The screenshot for the same is as follows.
Thus, from the above steps, we can say that to add a biller for SIP when it is through net banking, is easy.
In case of any further queries, you can contact us on 8451864111 on any working day between 9.30am to 6.30 pm or write a mail to us anytime at support@fincash.com or chat with us by logging onto our website www.fincash.com.
All efforts have been made to ensure the information provided here is accurate. However, no guarantees are made regarding correctness of data. Please verify with scheme information document before making any investment.
")


AMFI Registration No. 112358 | CIN: U74999MH2016PTC282153
Shepard Technologies Pvt. Ltd. (with ARN code 112358) makes no warranties or representations, express or implied, on products offered through the platform. It accepts no liability for any damages or losses, however caused, in connection with the use of, or on the reliance of its product or related services. Terms and conditions of the website are applicable.
©2026 Shepard Technologies Private Limited. All Rights Reserved